Passionate about Paper Crafting, Vintage items, DYI and just being creative.Release your creative inhibitions today!

Showing posts with label Distress Inks. Show all posts

Thursday, 1 October 2020

Stick it Down post: Hello Pumpkin!

 Sketch of the month:


My take includes:

Paper lines and embellishments by Simple Stories- Vintage Blessings; Carta Bella- Fall Break; Echo Park- Celebrate Autumn

Ink by Tim Holtz- Frayed Burlap and Peeled Paint

Tools: Sewing machine, Circle dies, stencil from stash

Techniques include: layering, stenciling, sewing, fussy cutting, die cutting and most of all mixing up lines and embellishments! 

Photos: Supplied by a proud Grandma! you can check her blog out HERE as she too is a brilliant scrapbooker!

Please play along and release your creative inhibitions and join in on the fun challenges over at Stick it Down


Sunday, 12 April 2020

Easter Tags- Process for

Not sure about the rest of the creative world but I can't stay with just one type or style of paper crafting. I just love it all! The clean, the cute, the grunge...never know what will come out!

The below is the process I used to create these very fun and cute, yet grungy, tags which I later used on card front's for Easter Cards.

Step 1:
  • Pull out some scraps from your stash and tear apart pieces, over lap, and place them on top of a 12x12 sheet of 80lb white paper just for planning purposes
  • Once happy, adhere all the pieces down using Matte Medium and brush a light coat of the matte medium on top of the entire sheet- I used Vicki Boutin Matte Acrylic Gel Medium
  • Leave to dry (won't take long at all) 
  • Tips: Using matte medium will seal the paper to allow you to build more texture on top without pilling the paper; Matte verses glossy leaves the paper without that intense shine which I prefer- makes the art feel more natural.Make sure you clean your brush immediately when finished as if left to dry will ruin the brush.


Step 2:
  • Cut sheet into 8, 2x6 pieces and snip the corners to make tags. 
Step 3:
  • Apply a lighter brown distress stain to the top- I used frayed burlap
  • Don't have to cover the entire tag but ensure you place enough on, especially where the pieces of paper are uneven to get into the creases- this is the grunge part :)
  • Using a cloth and some regular rubbing alcohol in a mini mister, spray the tag and gently remove as much of the stain as you want. If you removed too much, add some more!


Step 4:
  • Pick out a few complimentary lighter acrylic paints- I used Vicki Boutin Juicy Pear (shown in photo) and Cotton Candy
  • Squirt a dob of paint on a scrap paper and using your natural paint brushes (AKA finger) smear colors in various spots on the tag. Again pay attention to where the paper is uneven as it will get in the creases and add more texture to the tag


Step 5:
  • Pick out a complimentary distress ink, either Oxide or Regular- I used Distress Oxide, Broken China
  • Also pick out a stencil that appeals to you- I used on of Tim Holtz Stencils
  • Stencil the ink on using blending tool


Step 6:
  • Pick a complimentary permanent ink, I prefer Archival inks and used a pale blue one
  • Pick out a background stamp- Here I used a cracked glass one from Magenta
  • Stamp over the tag in random spots. 
  • Tip: Avoid using a stamp block as you don't want a clear perfect stamp, but rather just pick up the stamp in your hand and be very random on which part of the stamp you ink and stamp the tag- the more uneven the better! You are building layers and the illusion of depth 


Step 7:
  • Pick another background stamp- I used Simon Says "You Are" Stamp
  • Choose a dark permanent ink- I chose Distress Black Soot Archival
  • Using the same technique as above stamp random over the tag
  • Since this is permanent ink add a little at a time and know when to stop as this can't be removed.


Step 8:
  • Add highlights to the tag
  • This can be done in many ways, I used a white distress crayon, you you could use colored pencils, regular crayons- you just want to pay attention to those edges of raised paper again
  • Mark the color on and then smudge it using your finger


Step 9:
  • Decide what you use these tags for!
  • Mine were destined to showcase our daughters bunny, Thumper for Easter Cards
  • I trimmed the length of the tag so it would fit on a card front and inked all the edges with black Soot
  • Printed wallet size photo's (using my Canon Selfy CP900 Printer), matted them on black cardstock, used a black gel pen to make stitch lines all around


Hope you enjoy the process and experiment which what you have for supplies!
Happy Easter everyone! 

Sunday, 15 December 2019

My People

Getting the kiddos home is becoming more and more rare. One in Vancouver and now this one leaving for Regina, we must capture the memories!

Paper line and ephemera: Photo Play, Gypsy Rose
Other items and techniques: Distress ink (Mahogany and Forest Moss), Gesso, Alphabet and Love dies, Twine, rub-ons


Saturday, 31 March 2018

Watercolor Cards


I never would have dreamed Tim Holtz could make distress inks even more appealing then they already were, but he did!

The new distress inks are super reactive when water is applied and they make doing watercoloring cards so easy! All you need is the ink, a stamp with open spaces and a brush with water.

  1. Apply a thick layer of ink
  2. Use a water proof ink like versa ink and stamp an image 
  3. Using a brush apply water where you want to lift the color and viola!  
  4. For a process video check out Jennifer Mcguire Blog


Thursday, 30 November 2017

Just be You


Couldn't more proud of this human <3. Love her to pieces more every day and can't imagine this world without her.


Paper line and embellishments: Echo Park- "Just be You"
Stencil: Geometric Heart
Ink: Faded Jeans, Mustard Seed, Bundled Sage
EK Success- Border Punch  

Lots of stitching

Monday, 27 November 2017

Life is Lovely

We all need to take time to smell the flowers. In this instance I was smelling our gi-normous lilies!

They get larger and more beautiful each each. Right under the kitchen and our room window, the smell waffles through the house for several weeks.


Paper line: Echo Park- "Just be You" and Photo Play- "Think to Remember"
Dies: Edges; Tim Holtz Thinlets- "Calendar Words- Script and Mixed Media"; Lawn Fawn- "Stitched Circles"; Scribbles & Splat"
Ink: Distress Forest Moss and Oxide Picked Raspberry

Lots of sewing

Monday, 13 November 2017

Young Love

Our son and his girlfriend were celebrating a family wedding and took the opportunity to get a few photo's of themselves. This momma was very happy about that!


Products used:
Paper line by Fancy Pants- "Golden Days"
Embellishments by Fancy Pants- "Golden Days"
Inks: Distress Inks Hickory Smoke, Fossilised Amber and Chipped Sapphire
Dies: Spellbinder- Feathers; Die-matics- Cross Stitched Circles

Machine sewing

Sunday, 20 November 2016

Stack of Note Cards


Today's technology has is great...excellent for convenience. But nothing beats receiving "snail mail" to pick your spirits up!

I know for me, going to the post office to get mail is a chore but on that rare occasion I receive a hand written note, well it makes my day and makes me feel very special that someone took the time to do this.

This year as part of Christmas gifts I'm giving a pack of 6 note cards, hand crafted, so my special people can keep the gift going.

First stack was made with WPlus9 Pretty Peonies in a water color style. The ink used was a combination of Distress ink, on 110 lb water coloring paper. A little shine using the clear Wink of Stella and some pearls from my own stash set the stage for beautiful cards. 


To package I've layered the cards using vellum for protection and included the envelopes.


Inside the cards are blank so the recipient can hand write their own message to the special person in their life that they want to cheer up with a little snail mail.


Tuesday, 22 March 2016

Happy Retirement


I fall in love with Heartfelt Creations more and more every day. It is so easy to make elegant and beautiful cards using their products.

This is a retirement card I made using a combination of spellbinder dies, the Sun Kissed Dies and Stamps, Greenery from the Farmers Market Collection, ; Tag and centre from the Everyday Heroes Collection
More spellbinders and the beautiful black Border is from the Regal Borders and Pockets Die.


Used Abandoned Coral Distress ink for the flowers, some beads for the centre and a combination of Shabby Shutters and forest green on stems.


Enjoy and be inspired!

Monday, 23 February 2015

Bold & Beautiful


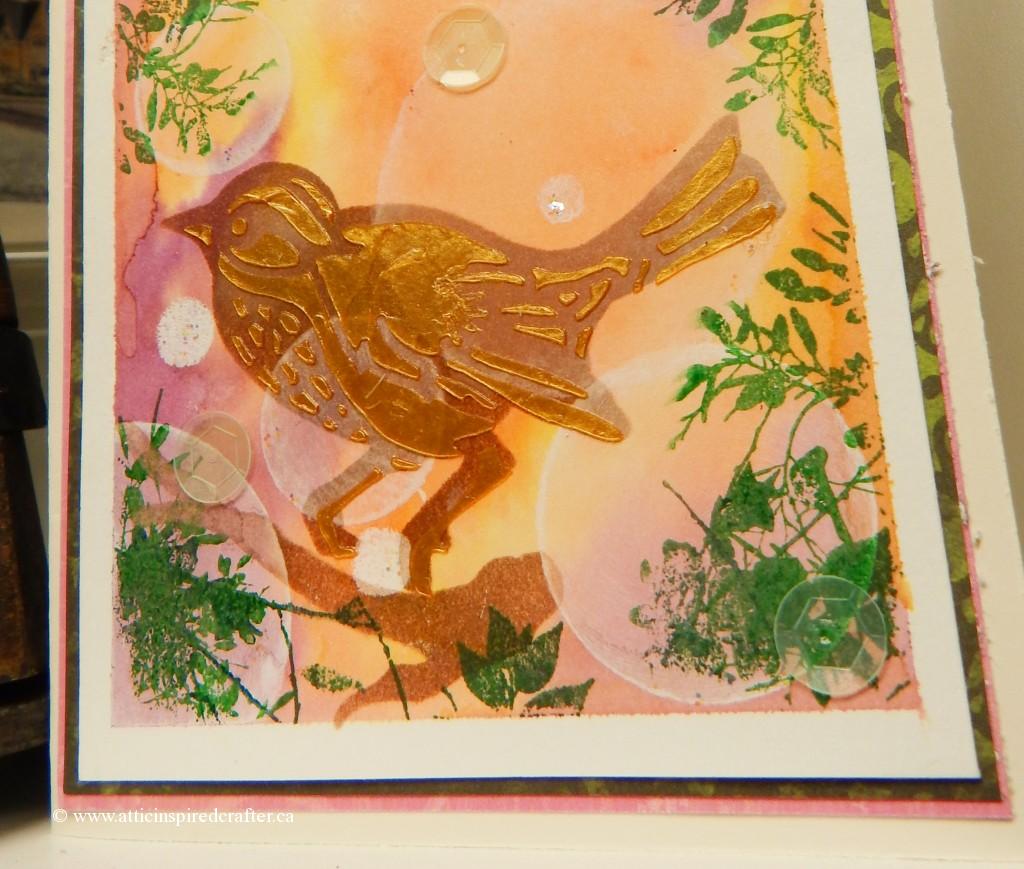
Love...LOVE this technique called Bokeh!!


Used several Distress inks, Claudine H white paint, Gold Embossing Paste,


(All of which can be viewed by following their link and seeing this post)

A few close up views


Monday, 13 October 2014

Shadow Box Project

A few weeks ago at the Gadget Girl Mega Fall Retreat I was working on a project that has been in the side lines for a while. Having two children (yes twins) graduate from High School last June, I wanted to display photo's done, in a special way. So I had a somewhat large photo box build (approx 36"x 20") with deep ledges, so I could make dimensional displays within the photo box and also have room to sit vintage finds along the way. Only half way done but I must say it's shaping up. The star of this project, besides my children, is Bo Bunny Mama Razzi II paper Line and embellishments.


 Here are a few close up's of the pages done, many techniques and mix media products used. Love sewing, adding textures and unconventional items, such as zippers, chipboard, stencils, paste and so much more to my projects.


This next part is Tim Holtz Clock that I've distressed using paint, ink, gesso, rub on's, then decorated with hand made flowers, bling and ribbon that was colored using distress stain to match the color pallet and butterflies, again using pattern paper and vellum.


The two mini albums were chosen as I fell in love with Prima's Julia Nutting doll stamps. These stamps bring me back to the day of playing with paper dolls and I wanted an excuse to use them. So I decided to make each child their own mini album which will eventually hang by hooks in the space you see.


I really hope you like this preview of my shadow box. Not sure when I'll get to finish but I'll be sure to post the completed project when done.